- Article published at:
- Article comments count: 0
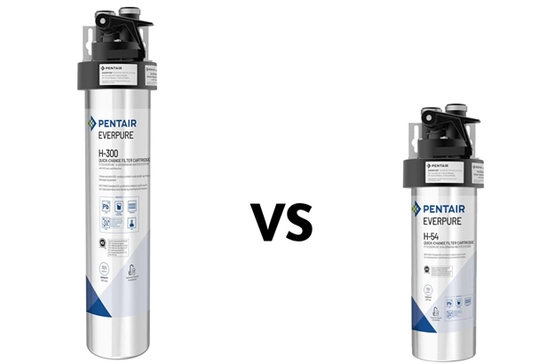
Choosing the right Everpure water filter can feel overwhelming if you are not familiar with filtration systems, model differences, or what your specific water needs are. Everpure is known for high quality filtration used in homes, restaurants, coffee shops, and commercial environments, but selecting the correct model requires more than simply picking the most popular option.
Understanding What an Everpure Water Filter Does
An Everpure water filter is designed to improve water quality by reducing contaminants such as chlorine, taste and odor causing compounds, sediment, and certain heavy metals. Most Everpure systems use a proprietary carbon block filtration process that provides consistent flow and effective contaminant reduction.
Unlike basic pitcher filters, Everpure systems are typically installed under a sink, at a point of use, or inline with appliances like coffee machines and ice makers. This makes them ideal for people who want high performance filtration without the complexity of whole house systems.
Before choosing a model, it is important to understand what you want your Everpure water filter to accomplish. Some people want better tasting drinking water. Others want to protect expensive appliances. Some need consistent water quality for beverages or food preparation. Your goal will help narrow your options.
Identify Your Primary Use Case
One of the first steps in choosing the right Everpure water filter is identifying how you plan to use it.
If your main goal is drinking water for your household, you may want a compact under sink system that provides clean, great tasting water at a single faucet. These models are designed for moderate daily use and are easy to maintain.
If you own a restaurant, cafe, or coffee shop, your needs will be different. Commercial Everpure water filter systems are designed to handle higher flow rates and larger volumes while maintaining consistent taste and protecting equipment from scale buildup.
For appliance protection, such as ice makers or espresso machines, Everpure offers dedicated filtration solutions that focus on chlorine reduction and sediment removal to extend equipment lifespan.
Knowing your primary use case helps eliminate models that are either too small or unnecessarily complex for your needs.
Test or Understand Your Water Quality
Water quality varies widely depending on location. Before choosing an Everpure water filter, it helps to understand what is in your water.
Common issues include chlorine taste, unpleasant odors, sediment, and hardness related minerals. Everpure water filters are particularly effective at chlorine reduction, which is one of the most common causes of poor tasting tap water.
If you are on municipal water, chlorine is almost always present. If you are on well water, sediment and particulate matter may be a bigger concern. Everpure systems are not designed to replace full well water treatment, but they can still improve taste and clarity when used appropriately.
Understanding your water quality helps you select a filter that targets your specific issues rather than paying for features you do not need.
Choose the Right Filtration Capacity
Filtration capacity refers to how much water an Everpure filter can process before the cartridge needs replacement. This is usually measured in gallons.
For residential use, lower capacity cartridges are often sufficient and more cost effective. These are ideal for households with average water consumption and limited space under the sink.
Commercial environments require higher capacity cartridges to handle constant use without frequent replacements. Choosing a system with insufficient capacity can lead to higher maintenance costs and inconsistent water quality.
When comparing Everpure water filter models, look at both the rated gallon capacity and the recommended replacement schedule. This will help you balance performance with ongoing costs.
Consider Flow Rate Requirements
Flow rate is another critical factor when choosing an Everpure water filter. Flow rate determines how quickly filtered water is delivered.
For drinking water faucets, a moderate flow rate is usually sufficient. You want enough pressure to fill glasses and cooking pots without noticeable delay.
For coffee machines, ice makers, and commercial kitchens, consistent flow rate is essential. Insufficient flow can affect beverage quality, ice production, and equipment performance.
Everpure systems are engineered to maintain steady flow while filtering water, but not all models are designed for high demand applications. Always match the filter’s flow rate to your intended use.
Installation Space and Setup
Available installation space plays a big role in determining which Everpure water filter is right for you.
Under sink installations require enough clearance for the filter head and cartridge. Compact models are available for tight spaces, making them ideal for apartments and smaller kitchens.
Commercial systems may require wall mounting or dedicated space near equipment. Some setups include multiple cartridges or pre filtration stages, which require more room.
Also consider whether you want a professional installation or a simpler system that can be installed by a homeowner. Many Everpure water filters are designed for straightforward installation, but commercial setups often benefit from professional support.
Cartridge Replacement and Maintenance
Ease of maintenance is an often overlooked but important factor when choosing an Everpure water filter.
Everpure cartridges are designed for quick and sanitary replacement. Most systems use a simple twist off design that does not require tools.
When comparing models, consider how often the cartridge needs replacement and how easy it is to source replacements. A model with a longer lifespan may cost more upfront but save money and time in the long run.
Regular maintenance ensures consistent water quality and protects the investment you have made in your filtration system.
Residential vs Commercial Everpure Water Filter Models
Everpure offers both residential and commercial grade filters, and it is important to choose the category that fits your needs.
Residential models focus on convenience, compact design, and affordability. They are perfect for improving drinking water quality and reducing chlorine taste and odor.
Commercial models are built for durability, higher flow rates, and larger capacities. They are commonly used in food service, hospitality, and beverage applications.
Choosing a commercial system for a home is often unnecessary, while choosing a residential system for a business can lead to performance issues. Matching the model to the environment ensures optimal results.
Budget and Long Term Value
While price is always a consideration, it should not be the only factor when choosing an Everpure water filter.
Cheaper systems may have lower capacity or require more frequent cartridge changes. Higher quality systems often provide better performance, longer lifespan, and more consistent results.
Consider the total cost of ownership, including replacement cartridges and maintenance. An Everpure water filter is an investment in water quality, appliance protection, and peace of mind.
Choosing the right Everpure water filter does not have to be complicated. By understanding your water quality, usage, and goals, you can select a system that delivers clean, great tasting water for years to come.
An Everpure water filter offers proven performance, reliable filtration, and trusted technology. With the right model, you can enjoy better water quality while protecting your home or business equipment and enhancing everyday experiences.
Read article


